

Getting tape-in extensions reinstalled isn’t just about applying fresh adhesive - it’s about preparing your hair and extensions properly. Without thorough prep, your extensions may slip or cause damage to your natural hair. Here's the process in simple steps:
- Remove Old Adhesive: Use alcohol-based removers to clean all traces of old tape from your hair and extensions.
- Clean Thoroughly: Wash your hair with a sulphate-free clarifying shampoo 2–3 times to remove oils and residue. Avoid conditioning near the roots.
- Dry Completely: Ensure both your natural hair and extensions are fully dry before reinstallation.
- Use the Right Tools: Fresh tape tabs, sectioning clips, a pintail comb, and extension pliers are essential for a secure application.
- Apply Carefully: Leave a small gap from the roots, avoid touching the adhesive, and press firmly to secure the bond.
Proper preparation ensures your extensions last 6–8 weeks, stay secure, and blend naturally with your hair. Skipping these steps can lead to slippage, irritation, or damage. Follow these guidelines for the best results.
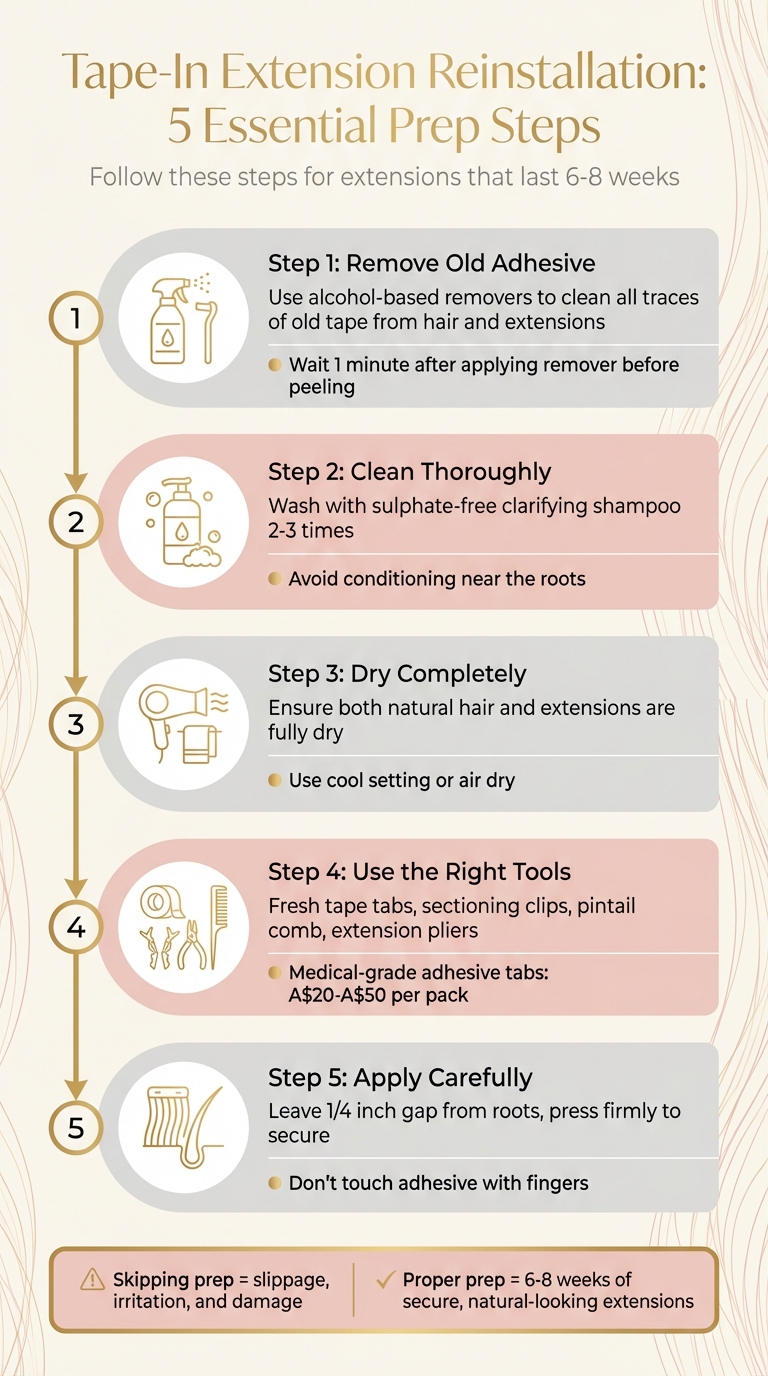
5-Step Process for Preparing Hair for Tape-In Extension Reinstallation
Why Preparation Matters
Benefits of Proper Preparation
Getting the prep right is the foundation of a secure, natural-looking bond for hair extensions. A clean hair surface ensures the tape adheres properly, providing a strong hold that lasts 6–8 weeks. This not only keeps your extensions in place but also extends their overall lifespan. Following a hair extension care routine further ensures your investment stays in top condition.
Preparation goes beyond adhesion - it also protects your natural hair. Detangling beforehand prevents matting, while proper sectioning reduces strain on your hair follicles. This is especially crucial for those with fine or fragile hair, as it lowers the risk of breakage or thinning. For the best results, your natural hair should be at least 7–8 cm long, ensuring a safe and secure installation.
Clean, prepped hair also ensures the extensions lay flat against your scalp, creating a seamless, undetectable look. When both your natural hair and the extension wefts are prepared correctly, the final result feels comfortable and looks effortlessly natural. These steps also set the stage for smooth removal and cleaning, which will be discussed in the next section.
Problems from Skipping Preparation
Skipping proper preparation can lead to a range of issues that affect both the durability of the extensions and the health of your hair. As Walker Tape explains:
"Whatever is on the outside of your client's hair, that is what the tape is going to stick to. If there's dust, dandruff, oils, other product, then our tapes become more like skinny little lint rollers and can have a lot shorter hold times".
This "lint roller effect" can cause premature slippage, shortening the lifespan of your extensions. Applying tape to damp hair is another common mistake - it causes the adhesive to bond with water molecules instead of your hair, resulting in a weak and unreliable hold.
Neglecting to assess the scalp before installation can also lead to irritation or worsen existing conditions like psoriasis or seborrheic dermatitis. Poor sectioning - such as placing tapes closer than 0.5 cm to the scalp - can create uncomfortable tension spots and pulling. Additionally, touching the adhesive with your fingers during application transfers oils that weaken the bond and may even cause air bubbles .
sbb-itb-dcde78e
REMOVING and REINSTALLING tape in extensions - NO DAMAGE TO NATURAL HAIR
Supplies You'll Need
Getting the right supplies ready can make reapplying your extensions much easier, while also ensuring your natural hair and extensions stay in great condition. You'll need three essential types of products: removal products to get rid of old adhesive, cleaning products to clear away residue, and reinstallation tools to secure the extensions with fresh tape. These items are the foundation for every step of the reinstallation process.
Removal Products
Alcohol-based removers are a must for breaking down medical-grade adhesive without leaving behind an oily residue. For example, products like No Trace work effectively to dissolve the adhesive, while sprays such as Extension Release should be applied generously to coat the top of each weft. After applying the remover, wait a few minutes before gently peeling off the tape with your fingernails. If the tape resists, add more remover and wait another minute instead of forcing it off.
Once the extensions are detached, use a product like Weft Release to clean the adhesive from the extension tabs. Lay the wefts sticky-side up on a flat surface and apply the product to loosen any leftover glue. For extra cleaning power, add a drop of dish soap to remove lingering oil before rinsing. A tail comb or scraper kit (approximately $8.99) can make it easier to separate the wefts once the adhesive has softened.
After the adhesive is fully removed, it’s time to clean both your natural hair and the extensions thoroughly.
Cleaning Products
A clarifying shampoo is the most important cleaning tool for prepping your hair for reinstallation. Products like Extension Prep or other sulphate-free clarifying shampoos are great for removing oils, silicone, and adhesive residue from your natural hair and extensions. According to Mallory Chafins, the owner of Mallory Lane Salon & Gallery:
"The client should come in with freshly clarified hair that is free of product and only conditioned from the midshaft down".
To ensure a proper cleanse, wash your hair with a sulphate-free clarifying shampoo 2–3 times, focusing on removing oils and residue. Then, apply conditioner only to the mid-lengths and ends of your hair. Professional clarifying shampoos typically range from $19.99 to $59.00.
Once your hair and extensions are clean, you can focus on assembling the tools needed for a secure reinstallation.
Reinstallation Tools
To rebond the extensions, you’ll need fresh replacement tape tabs, which cost around $3.99 per pack. Sectioning clips are essential for keeping stray hairs away from the adhesive, and a pintail or metal tooth comb will help you create neat, precise sections. When sectioning, make sure the hair is thin enough to pass the "watch test" - you should be able to see a watch face through the section. This ensures the tape bonds properly on both sides.
Extension pliers or clamping tools are used to apply firm, even pressure to seal the tape "sandwich" without trapping air bubbles. While some stylists use a flat iron to heat-set the tape, experts often recommend using only pliers. Excessive heat can make future removal harder and leave behind heavy residue. If you opt for heat, use an older straightening iron to avoid adhesive transfer.
For added convenience, companies like Hair Wonderland offer tape sheets ($78.00), removal solutions ($54.00), and styling combs ($12.95) designed specifically for tape-in extensions. Using these tools properly ensures a secure, long-lasting bond while making the process easier and more precise.
How to Prepare Hair for Reinstallation
Before diving into the process, gather all the necessary tools and products. Proper preparation involves three key steps: removing the old tape, cleaning the extensions, and getting your natural hair and scalp ready. Following these steps carefully ensures a strong bond for the new tape and helps protect both your extensions and natural hair.
Removing Old Tape and Adhesive
Start by gently warming the tape tabs with a low-heat hairdryer. This softens the adhesive, making it easier to remove. Once the tape feels warm, generously apply adhesive remover to each tape tab. Let it sit for about a minute to break down the glue. Then, carefully peel back the tape from one corner. Avoid pulling too hard, as this could damage your natural hair. If the tape doesn’t come off easily, add a bit more remover and wait another minute instead of forcing it.
After removing the wefts, use a fine-tooth comb to lift any leftover adhesive from your hair. Finish by wiping your scalp with alcohol swabs to remove any remaining oils or residue. This step ensures a clean surface for reinstallation and preserves the quality of both your natural hair and the extensions.
Cleaning Extensions
Wash your extensions with a sulphate-free shampoo and lukewarm water. Hot water can weaken the hair structure, so stick to lukewarm temperatures. Use gentle, downward strokes while washing to avoid tangling. When conditioning, apply the product only from the mid-lengths to the ends, keeping it away from the top of the weft where the new tape will go. As INH Professional highlights:
Skip DIY removal; use INH Bond Remover with a pro for clean results.
After washing, gently squeeze out excess water and pat the extensions dry with a soft towel. Let them air dry naturally or use a hairdryer on a cool setting. If you opt for heat, apply a heat protectant and stick to low temperatures to maintain the extensions’ integrity.
Preparing Natural Hair and Scalp
Once the extensions are ready, shift focus to your natural hair and scalp. Wash your hair thoroughly with a clarifying shampoo two to three times to remove all oils and residue. When applying conditioner, focus on the mid-lengths and ends, avoiding the roots where the tape will adhere.
Ensure both your natural hair and the extensions are completely dry before reinstallation. For those with fine or slippery hair, lightly teasing the roots where the tape will be applied can provide a more secure base for the adhesive. Proper scalp preparation not only cleans but also creates the ideal foundation for a long-lasting and comfortable bond.
Applying Fresh Tape Tabs
Once your hair and wefts are thoroughly cleaned and prepped, it's time to reapply fresh adhesive tabs. This step is essential for ensuring a strong and durable bond. With clean, dry hair, attach the new adhesive tabs carefully. The quality of the tape tabs and how well they're applied will determine whether your extensions stay in place for six to eight weeks - or start slipping after just a few days.
Choosing the Right Tape Tabs
The first step is selecting high-quality tape tabs. These should bond directly to clean hair fibres, free from oils, dust, or leftover product residue.
Professional-grade tabs are typically made with medical-grade polyurethane or cyanoacrylate-based adhesives - materials commonly used in medical wound closures. These adhesives provide a strong, long-lasting hold while being gentle on the scalp. Replacement adhesive tabs usually cost between A$20 and A$50 per pack, and with proper care, premium Remy human hair extensions can be retaped and reused two to six times.
Once you've chosen the right tabs, the next step is applying them with precision.
Proper Placement and Application
Start by ensuring the weft surface is entirely free of old adhesive. Even small remnants of leftover tape can cause common hair extension problems like slippage within days. When applying the adhesive, spread it evenly and avoid air bubbles. It's crucial not to touch the adhesive directly, as oils from your fingers can weaken the bond.
To apply, take a 1/4-inch section of your natural hair and position one tape strip underneath it, leaving about 1/4 inch of space from your roots. This small gap helps prevent scalp irritation and ensures natural hair movement , reducing the risk of an itchy scalp. Place a second strip on top, sandwiching the hair, and press firmly to secure the bond. For added strength, use a flat iron on the bonded tabs for a few seconds.
Accuracy is key. Properly aligned tapes help avoid issues like pinching, tugging, or exposed adhesive, which can lead to matting. A tail comb is handy for creating precise horizontal partings, and hair clips can keep surrounding hair out of the way during application. Lastly, wait 48 to 72 hours before washing your hair to allow the adhesive to fully cure.
Brushing and Blending
Once the adhesive has cured, the next step is brushing and blending your extensions with your natural hair to create a smooth, polished finish. Using the right tools and techniques is essential to avoid tangling, protect the adhesive bonds, and achieve a natural look. This step ties together the reinstallation process with a styled, flawless appearance.
How to Brush Extensions
Choose a detangling brush specifically designed for tape-in extensions - these brushes have flexible teeth that glide through knots gently. Regular brushes can snag on the tape tabs, leading to shedding, discomfort, or even bond slippage. A specialised brush works effectively on both wet and dry hair, helping to minimise breakage and split ends while keeping the adhesive bonds intact. Proper brushing not only detangles but also prepares your hair for blending with the extensions.
Start brushing at the ends and work your way up in small sections, holding the hair close to the roots to protect the tape bonds. Avoid brushing directly over the tape tabs and use controlled, gentle strokes. During the first 48 hours after reinstallation, limit brushing each section to five to ten passes to avoid weakening the adhesive.
Blending Extensions with Natural Hair
For a seamless blend, section your hair so the extension rows align naturally with your hair's layers, ensuring the wefts are evenly distributed. Stagger the placement of the rows by about 1–2 cm to create a more natural flow.
When styling, follow a guide to heat styling extensions using low-heat tools (no higher than 180°C) to match the textures of your hair and extensions. In Australia's humid conditions, applying a lightweight serum sparingly can help control frizz without leaving a sticky residue. To finish, use a round brush or a blow-dryer on a cool setting to add shine and encourage natural movement. Inspect your hair in natural light and trim any uneven ends to ensure a flawless, unified look. This final blending step ensures your natural and extended hair come together perfectly, completing the process with a polished result.
Conclusion
Thorough preparation is key to a successful tape-in extension reinstallation. By removing old adhesive residue and learning how to remove extensions without causing damage and clarifying your hair, you can prevent slippage just days after a touch-up. Careful re-sectioning also helps protect your natural hair during the process.
These steps not only prolong the life of your extensions but also maintain the health of your natural hair. As Hair Wonderland states, "Leaving extensions in for too long can damage your natural hair". Scheduling professional maintenance every 5–6 weeks - or as frequently as every 4 weeks for finer hair - helps to avoid unnecessary strain on your hair.
Remember to deep condition, thoroughly clean your hair, and allow it to rest between sessions. This ensures the tape bonds hold securely and your extensions blend naturally.
For the best results, start with a well-prepped base. Check out Hair Wonderland's range of specialised tools and products, from gentle adhesive removers to detangling brushes designed for tape-in extensions. Having the right tools not only simplifies preparation but also protects your extensions, ensuring they last longer and look flawless.
FAQs
How do I know all the old tape is fully removed?
To make sure all the old tape is gone, carefully check for any sticky residue or leftover adhesive in your hair. Use proper tools and methods to remove it, and take the time to thoroughly inspect your hair after detaching the extensions. Avoid rushing or pulling, as this can leave behind residue or even damage your hair. Once you're sure there’s no adhesive left and all bonds are fully detached, you can be confident the tape has been completely removed.
Can I reinstall tape-ins if my scalp is itchy or irritated?
If your scalp feels itchy or irritated, it's best to hold off on reinstalling tape-in extensions. Reapplying them during this time could aggravate the issue and lead to more damage. Prioritise getting your scalp back to a healthy state before considering reinstallation. This will help ensure the process is both safe and comfortable.
What should I do if my tape-ins keep slipping after reinstall?
If your tape-in extensions are slipping, it could be caused by a few common issues: improper application, excess oil, or insufficient scalp preparation. To minimise this, start by making sure your hair and scalp are thoroughly cleaned and free of oil or product residue before applying the extensions. Steer clear of heavy hair products near the tape bonds, as these can weaken the adhesive.
For best results, plan regular maintenance appointments every 6–8 weeks. Additionally, investing in high-quality extensions and following proper application techniques can go a long way in keeping them secure.