

Clip-in extensions can be tricky to keep in place, especially if your hair is fine, silky, or freshly washed. Slipping clips or unnatural placement can ruin the look and your confidence. Here’s how you can secure your extensions all day:
- Add Texture: Use texturising sprays or powders at the roots for grip. Avoid heavy conditioners or oils near the scalp.
- Tease or Braid: Backcomb or create small braids at the roots to anchor the clips.
- Section Properly: Make clean, horizontal parts and clip close to the scalp.
- Use Bobby Pins: Place pins in a criss-cross pattern for extra hold.
- Set with Hairspray: Lightly mist the roots and clips to keep everything secure.
These simple steps ensure your extensions stay in place, look natural, and feel comfortable throughout the day.
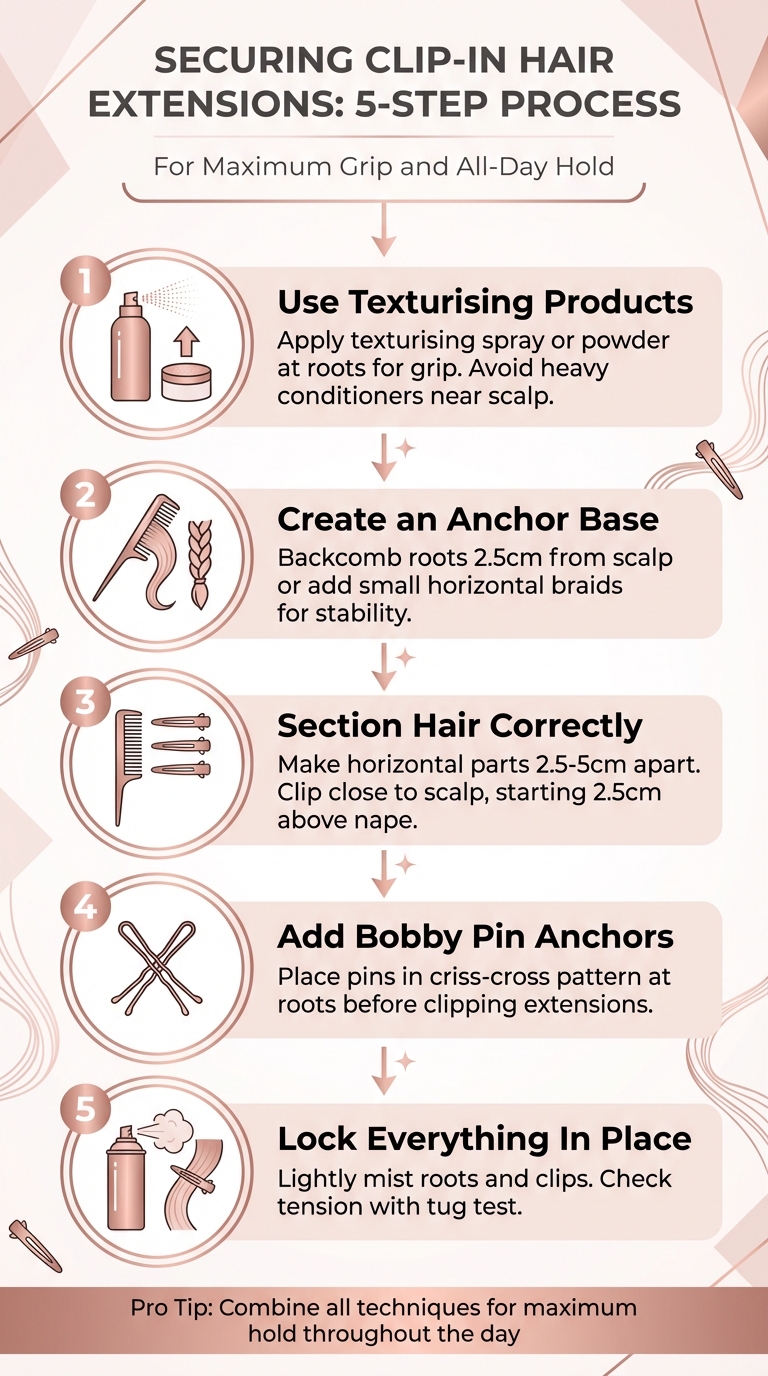
5-Step Guide to Securing Clip-In Hair Extensions
How to put in clip in extensions so they wont slip or fall out | 408beautybygreta
1. Use Texturising Products to Create Grip
Freshly washed, silky hair can be a challenge when it comes to securing extensions. Smooth or fine hair often lacks the grip needed for clips to stay in place, leading to slipping or popping open. This is where texturising products come in handy - they provide the friction necessary to keep your extensions firmly attached.
Texturising powders and sprays are particularly effective. Powders can thicken the roots temporarily, while sprays reduce natural slipperiness, making it easier for clips to latch on. As Cliphair explains:
"Applying a light-hold hairspray or texturizing spray to your natural hair before clipping in extensions can create more friction and help the clips stay securely attached." – Cliphair
When using these products, focus on applying them directly at the roots, where the clips will sit. Avoid the mid-lengths or ends, as the goal is to create grip at the base. On days you plan to wear extensions, steer clear of heavy conditioners or oils near the roots, as these can make your hair too slippery. For those with fine hair, adding a bit of light backcombing at the roots can create a "texture nest", giving the clips something extra to hold onto.
2. Tease Roots or Add Small Braids for a Stable Base
Sometimes, texturising products alone might not do the trick. To give your hair extensions a secure grip, you can create an anchor by teasing (backcombing) or adding small braids. This is especially useful if you have fine, thin, or silky hair where clips tend to slip.
To tease safely, use a fine-toothed comb and start about 2.5 cm away from your scalp. Gently use short, downward strokes - there’s no need to go overboard. Soft movements help avoid breakage while still creating the grip you need. Once you’ve teased the area, smooth the top layer lightly with a brush to keep the textured base hidden. As Brenda L. from Cliphair US explains:
"Backcombing is a must as it creates a mini nest of texture for the clips to grip on too preventing them from slipping." – Brenda L., Cliphair US
If teasing alone doesn’t hold well enough, braiding can offer extra stability. For very fine hair, try creating a thin horizontal braid (like a small cornrow or plait) about 2.5 cm from your hairline where the weft will sit. This braid acts as a firm anchor for the clips and can also help blend shorter natural layers at the nape with your longer extensions.
Remember to comb out teased sections before going to bed to avoid tangling. For even more hold, you can mist the teased or braided area with a light-hold hairspray before attaching your extensions.
These tips work beautifully alongside other techniques to keep your extensions secure all day - perfect for the premium fit of Hair Wonderland's range of products.
3. Section Hair Properly and Clip Close to the Scalp
After creating texture and teasing your hair, proper sectioning is the next step to ensure your extensions stay secure and blend seamlessly. A well-planned layout makes all the difference. Start by creating a horizontal part about 2.5 cm above the nape of your neck using a rat-tail comb. This initial section is key - it must be perfectly straight. As Kiki Hair advises:
"Ensure the section is a straight line as uneven parts can cause bumps and make the extensions noticeable" – Kiki Hair
Continue making horizontal sections spaced 2.5–5 cm apart. This method works hand-in-hand with the textured base you’ve already created. Keep all wefts below eyebrow level to keep the clips completely hidden. For the sides, make horizontal parts approximately 5 cm above your ears and position the wefts at least 2.5 cm back from your hairline. This ensures the clips stay concealed when your hair moves naturally.
When attaching a weft, always secure the central clip first, then fasten the side clips. Prue from Lady and the Hair suggests:
"Secure the middle clip first as you press it close to the roots. Then, part the side clips into place, ensuring that the weft lies flat and snugs without pulling at your scalp" – Prue, Lady and the Hair
To prevent sagging, gently stretch the weft horizontally before securing the outer clips.
Use wider wefts with three or four clips for the back of your head to create balanced volume. For the sides and temples, opt for smaller wefts with one or two clips. This approach builds natural fullness without overwhelming any single area. If you have short hair at the nape, pin or braid it to form a smooth, secure base.
Lastly, make sure the clips sit firmly against your roots. If a weft slides when gently tugged, add more of your natural hair into the clip for a stronger hold.
sbb-itb-dcde78e
4. Add Bobby Pins in a Criss-Cross Pattern for Extra Security
Once you've texturised and sectioned your hair, you can take things a step further by using bobby pins to create a mechanical anchor. This is especially helpful for hair types that struggle to hold extensions securely. By placing bobby pins in a criss-cross pattern, you create a sturdy base that helps keep clips in place throughout the day. This trick is a lifesaver for active occasions, workouts, or those long days when you need your extensions to stay put no matter what. It works hand-in-hand with the other techniques to add an extra layer of security.
For the best results, match the bobby pins to your hair colour. Start by inserting two pins in an 'X' shape at the roots of the section where you'll clip the extension. Then, attach the extension directly onto this criss-crossed base instead of just onto your natural hair. Emma Howe from Stranded Hair Group sums it up perfectly:
"The bobby pins provide extra reinforcement, especially for thin hair, reducing the chance of movement." – Emma Howe, Content Creator, Stranded Hair Group
Blending is key to keeping your pins discreet. Use matte black pins for dark hair, bronze for brunettes, or gold for blonde shades. Focus on matching the pins to your root colour, as this is where they'll sit. Position the anchor at least 2.5 cm below your natural part so the top layer of hair covers it completely.
For even better grip, prep your roots with a texturising spray or dry shampoo before adding the bobby pins. This creates a slightly tacky surface, giving both the pins and the clips more friction to hold onto. Combined with the criss-cross anchor, this method ensures your extensions stay secure all day long.
5. Set with Hairspray and Check Clip Tension
Once you've prepped your hair with texturising and bobby pin techniques, it's time to lock everything in place. Lightly mist your extensions with a residue-free hairspray to secure the clips and boost friction at the roots. A quick spritz on the teased roots and clips helps keep the wefts from shifting throughout the day.
Choose a lightweight hairspray that won't leave your hair feeling heavy or greasy. Avoid products with silicones near the roots, as they can make your hair too smooth, increasing the risk of slippage. On particularly active days, combining hairspray with the criss-cross bobby pin method mentioned earlier adds an extra layer of security.
Before heading out, do a quick tug test on each weft. If a clip slides, it might mean the section of hair is too thick, causing the clip to pop, or too thin, making it hard to grip. Adjust accordingly. If a clip feels uncomfortable, reclip it immediately. For fine hair, loosen the tension slightly to avoid damage or scalp strain. For thicker or coarser hair, you may need to tighten the clips a bit more to handle the extra weight. The key is to achieve a secure grip that feels comfortable without causing headaches or putting stress on your scalp - this helps prevent issues like traction alopecia while keeping your extensions firmly in place.
If you notice any movement during the day, use a comb to re-section and re-secure loose clips right away. Regular checks like this ensure your extensions stay secure and maintain the stability you've worked to achieve in earlier steps.
Conclusion
To keep your clip-in extensions secure and comfortable, preparation and placement are everything. Using texturising products and backcombing creates the grip your clips need, while proper sectioning ensures the weight is evenly distributed across your natural hair. Avoid sections that are too thin, as they can lead to slippage, and steer clear of overly thick sections that might cause the clips to pop off. Striking the right balance makes all the difference.
For extra hold, try a criss-cross pattern with bobby pins and finish with a light mist of hairspray. Regularly checking the tension throughout the day can help you catch and fix any slipping before it becomes noticeable.
These simple techniques not only keep your extensions in place but also highlight the importance of quality products. Hair Wonderland offers premium clip-in extensions made from 100% Remy European human hair, designed to blend naturally and last. Their Seamless Set 22" ($499.00) features lightweight Invisi® weft technology for a comfortable, discreet fit. To keep your extensions in top shape, accessories like the Tangle Tamer Brush ($21.95) and Clip In Bag ($54.00) are excellent additions.
Explore the full range of extensions, styling tools, and care products at Hair Wonderland. With these tips and the right tools, you’ll enjoy secure, flawless clip-in extensions all day long.
FAQs
How do I stop clips slipping on fine, silky hair?
To ensure clip-in extensions stay secure on fine, silky hair, start by working in small sections close to the scalp. Before clipping them in, use a texturising spray or a light styling product to create some grip, which helps prevent slipping. Make sure the clips are fully closed and positioned firmly - this is crucial for keeping the extensions in place all day. Proper placement and a little added texture make all the difference!
How tight should clip-in extensions feel on my scalp?
Clip-in extensions should sit securely without causing any pain or discomfort. They should be snug enough to stay put but not so tight that they create pressure on your scalp. For a firmer grip, try sectioning your hair into thicker portions, lightly teasing the roots, or applying a texturising product. Be cautious not to fasten them too tightly, as this could lead to discomfort or even damage over time.
Can I wear clip-ins during workouts or windy days?
Yes, you can wear clip-in extensions during workouts or on windy days, but it’s all about taking the right precautions. To keep them in place, make sure they’re applied securely, use hairstyles that limit movement (like braids or buns), and opt for extensions specifically made for active lifestyles. These steps help prevent slipping or damage, so you can go about your day confidently - even in tougher conditions.